How Laser-Cut Puzzles Are Made
Laser cutting makes it possible to reproduce complex puzzle shapes with precision. This article covers the cutting principle, artwork and path preparation, and board selection and fixing, then turns to settings, sanding and how precision affects the fit.
Key takeaways
-
Parameter Trade-offs Power, speed and focus must be tuned with test cuts; both kerf width and the degree of charring directly affect the strength of the knob necks and how tightly the pieces fit.
-
Post-Processing Is Essential Sanding and dust removal clear away carbon dust and burrs, but the pressure must be restrained; over-sanding changes the outline dimensions and ruins the fit.
-
Precision Determines Feel Only a consistent kerf, good squareness and accurate alignment produce moderate resistance and a clear sense of pieces dropping into place, which is an important measure of how carefully a puzzle was made.
The Basic Principle of Laser Cutting
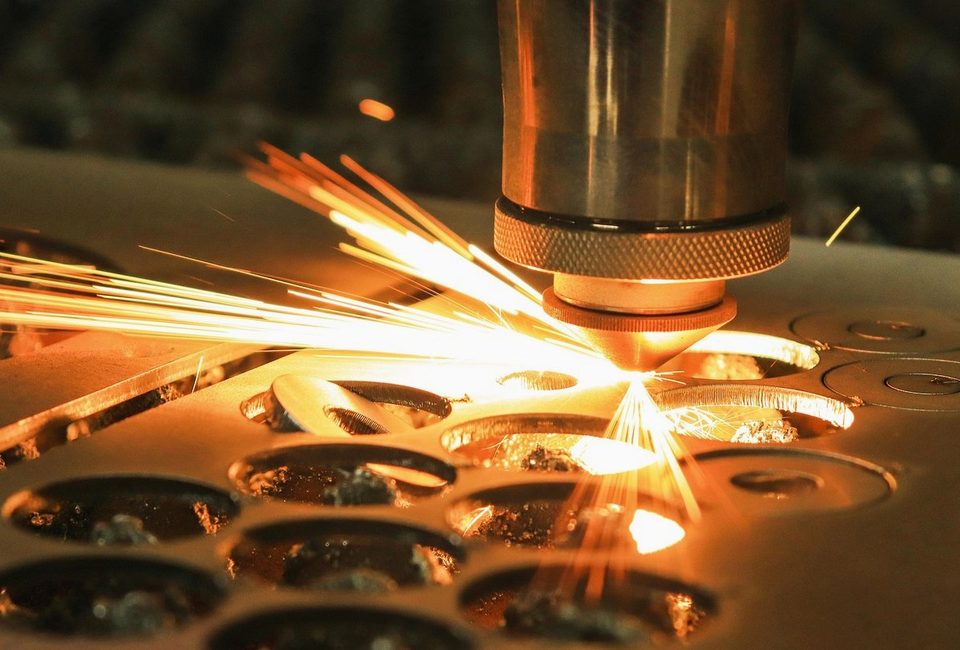
At the heart of laser cutting, a lens focuses the laser beam into an extremely fine spot that strikes the surface of the board. Energy is highly concentrated where the spot lands, and the wood fibers quickly carbonize and vaporize under the heat, so the material separates along the path of the beam. No blade touches the board at any point, so there is no blade wear and no mechanical pressure on the pieces.
The machines used for cutting wood mostly rely on CO2 lasers. Their wavelength is readily absorbed by organic materials such as wood and paper, which keeps cutting efficiency and edge quality fairly stable. The laser head is driven by a control system and moves along guide rails in two directions, cutting segment by segment along a preset path. Once the path is set, the same artwork can be run again and again, and the outline of every piece stays highly consistent.
Compared with traditional scroll saws and stamping dies, laser cutting offers noticeably greater freedom of shape. A scroll saw depends on the operator's hand, and stamping requires a dedicated cutting die to be made first; both are limited when it comes to tiny corners and irregular curves. A laser needs only an edited digital file to change an outline, so irregular edges, fine interlocking knobs and small custom runs can all be handled with the same process.
Preparing the Artwork and Cutting Path
Before cutting, the machine needs a vector file it can read. A puzzle outline is not an ordinary photograph but a path made up of lines and nodes, usually saved in a vector format. Each line represents a route the laser will follow, and two neighboring pieces share the same boundary, so a single line determines the shape of both. The designer must make sure these lines are continuous and closed, with no redundant overlapping nodes.
Once the artwork is complete, the details of the paths still need checking. Overly sharp corners tend to create fragile protrusions on a piece, and necks that are too narrow may snap during assembly. In design, the base of each protruding knob is usually kept suitably wide and the interlocking curves are kept smooth. These adjustments may seem minor, yet they directly affect how durable the pieces are and how smoothly they fit together.
Besides the outline, the artwork often contains other layers. The outer edge of the border, any designs to be engraved and alignment marks, for example, each correspond to a different machining action. Cutting lines and engraving lines are distinguished by color or layer so that the machine engraves first and cuts afterward, preventing pieces from separating and shifting beforehand. Organizing the order and properties of the layers is a step that cannot be skipped before machining begins.
- Confirm that paths are continuous, closed lines
- Remove duplicate and redundant nodes
- Check that corners and necks are wide enough
- Arrange layers according to the machining sequence
Choosing and Securing the Board
The choice of board directly affects the cutting result and the quality of the finished piece. Boards commonly used for puzzles include multilayer plywood such as basswood and birch, which has a fine grain and even thickness and cuts with fairly clean edges. If a board contains a lot of resin or uneven glue layers, the laser may cause localized scorching or fail to cut all the way through. For this reason, the flatness and internal structure of the board are usually checked before mass production.
Once the board is on the worktable, how it is held down matters just as much. If a board is even slightly warped, the distance between the laser's focal point and the surface changes, leaving the kerf too wide in some areas or the cut incomplete. A common approach is a honeycomb table combined with exhaust and suction to hold the board flat against the bed; weights or clamps can also help press it flat. The flatter it is held, the more stable the focus, and the more consistent the kerf width across the board.
Protecting the surface of the board also deserves attention. Laser cutting produces smoke, which can leave smoky marks on the wood, especially on a printed front face. Many makers apply a protective film to the surface and peel it off after cutting to keep the image clean. If the board is printed beforehand, the artwork must be carefully registered with the cutting path so that the edges of the image line up exactly with the outlines of the pieces.
Cutting Settings and Edge Finishing
Cutting parameters depend mainly on the combination of laser power, travel speed and focal position. If the power is too high or the speed too slow, the wood burns too deeply, the kerf widens and the edges show a distinct charred black rim; if the power is too low or the speed too fast, the beam may not cut all the way through, leaving fine fibers still connected. In practice, small test pieces are usually cut first from the same batch of board, and the settings are then fine-tuned based on the results.
Focal position matters just as much. If the focus drifts away from the board surface, the beam spot grows larger and its energy disperses, so the kerf widens and sharp corners in the design become rounded. In a jigsaw puzzle, the neck of each knob is the thinnest and most vulnerable spot: a neck that is too narrow will break, while one that is too wide makes the fit between knob and socket feel loose. For this reason, kerf width must be accounted for with compensation already at the artwork stage.
Edge treatment is the first finishing step after cutting. The charred layer left by the laser is not deep, but it can stain fingers and neighboring images and leave the edges feeling dry and rough. A common approach is to use exhaust and airflow to reduce smoke and soot deposits, then deal with any remaining carbon dust in later steps. Wood grain and resin content vary, so edge color and odor will differ as well; these are natural characteristics of the material itself.
Sanding and Cleaning Steps
Once cutting is finished, the board is not yet a puzzle. The edges of the pieces carry carbon dust, and the surface may still bear adhesive marks from the protective film or traces of smoke. The purpose of sanding is to remove these deposits without changing the dimensions of the outlines, leaving edges smooth and the surface even. This step looks simple, but it calls for a restrained hand, because over-sanding thins the knobs and directly affects how tight or loose the pieces fit together.
The usual sanding and cleaning steps are roughly as follows, though the actual order is adjusted to suit the board and the workshop's habits:
After sanding, dust must be removed thoroughly; otherwise leftover wood dust will lodge in the gaps when the puzzle is assembled and keep pieces from seating fully. Cleaning is done mainly dry, avoiding large amounts of water so that the wood does not absorb moisture, swell and change size. Once cleaned, the pieces are checked in groups by image area, and any with chipped corners or cracks are removed before the pieces move on to boxing.
- Lightly sand the edges of the pieces with fine sandpaper to remove carbon dust and burrs
- Gently wipe the surface to remove adhesive residue from the protective film and smoke marks
- Clear wood dust from the gaps with a soft brush or a puff of air
- Check each piece for cracks, chipped corners or connection points that were not cut through
- Sort the pieces into groups by image area to make boxing and counting easier
How Cutting Precision Affects Fit
The most direct effect of cutting precision is how tightly or loosely the pieces fit together. When the kerf width is consistent and the outlines match the artwork, neighboring pieces neither wobble nor need to be forced in once they interlock. If the kerf varies from wide to narrow, some pieces end up too loose and others too tight; the feel of assembly becomes inconsistent, and the finished puzzle is prone to local bumps or gaps.
Precision also affects overall alignment. If the board shifts slightly during cutting, or the laser head deviates at high-speed corners, the accumulated error can leave the borders of the whole puzzle out of line. Wooden puzzles are fairly thick, so the squareness of the kerf can be felt as well: a slanted cut face lets pieces grip only at the surface, and they easily come apart when the puzzle is flipped over. Squareness and horizontal accuracy therefore need to be checked together.
For the person assembling it, good precision shows up as a sense of the piece "dropping into place": once aligned, a piece sinks gently into position and is held there by just the right amount of resistance. This feel is the combined result of artwork compensation, parameter settings, board fixturing and sanding, and an error in any one of them gets magnified. Understanding this process also helps you judge how carefully a piece was made, and gives you a firmer basis for collecting and caring for it.
This article provides general information only and does not constitute professional advice.